But now I've got my own computer (**whew** finally) and I'm ready to start making some time for all my friends on blogger! Thanks to everyone who has stuck around and hi to all the new followers!
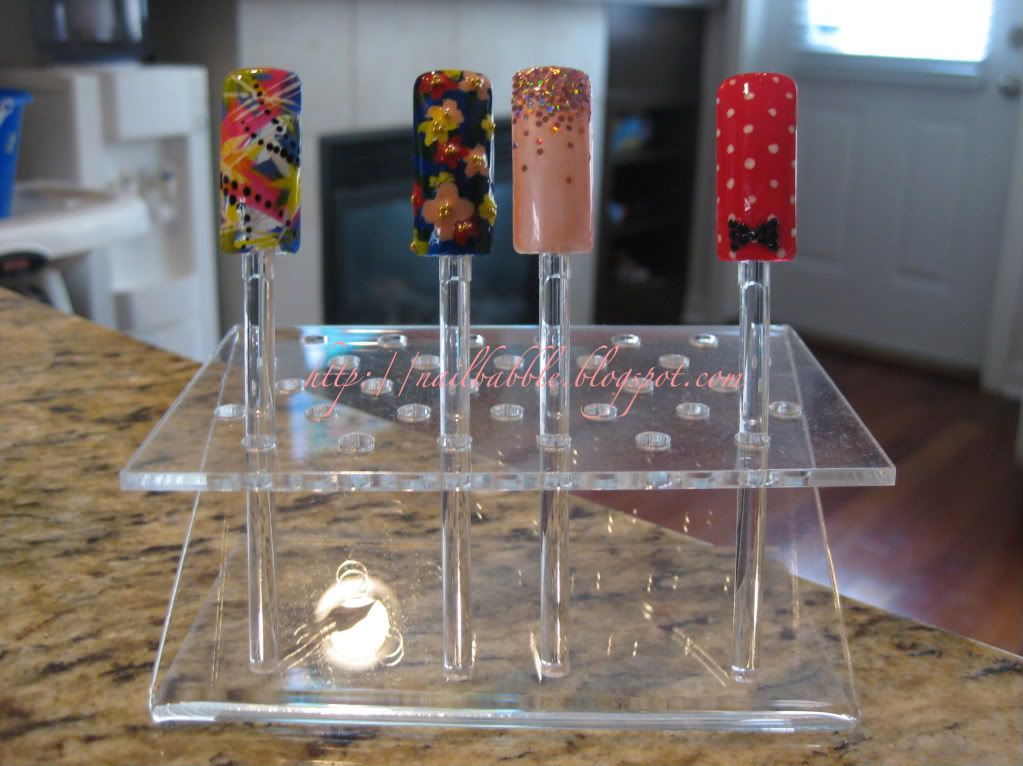
So a while ago I picked up this nail art stand at a beauty supply shop near me. It cost me $16 minus my 10% student discount and I think it is such a great idea.
EDIT: Hey guys, didn't realize how big the pic was so please click on the pictures below to see all the nail art samples :) thanks.

This way, if anyone wants nail art done, but they don't have anything particular in mind they can pick from an assortment of nail art that I'll have handy. And I can put coloured polish on the bottom of the sticks to colour code the prices. (ie. Pink=$15, Yellow=$5, etc) And I love that they are clear nails, cuz some of them come in a whitest hue and it doesn't look as nice unless you polish the whole thing.
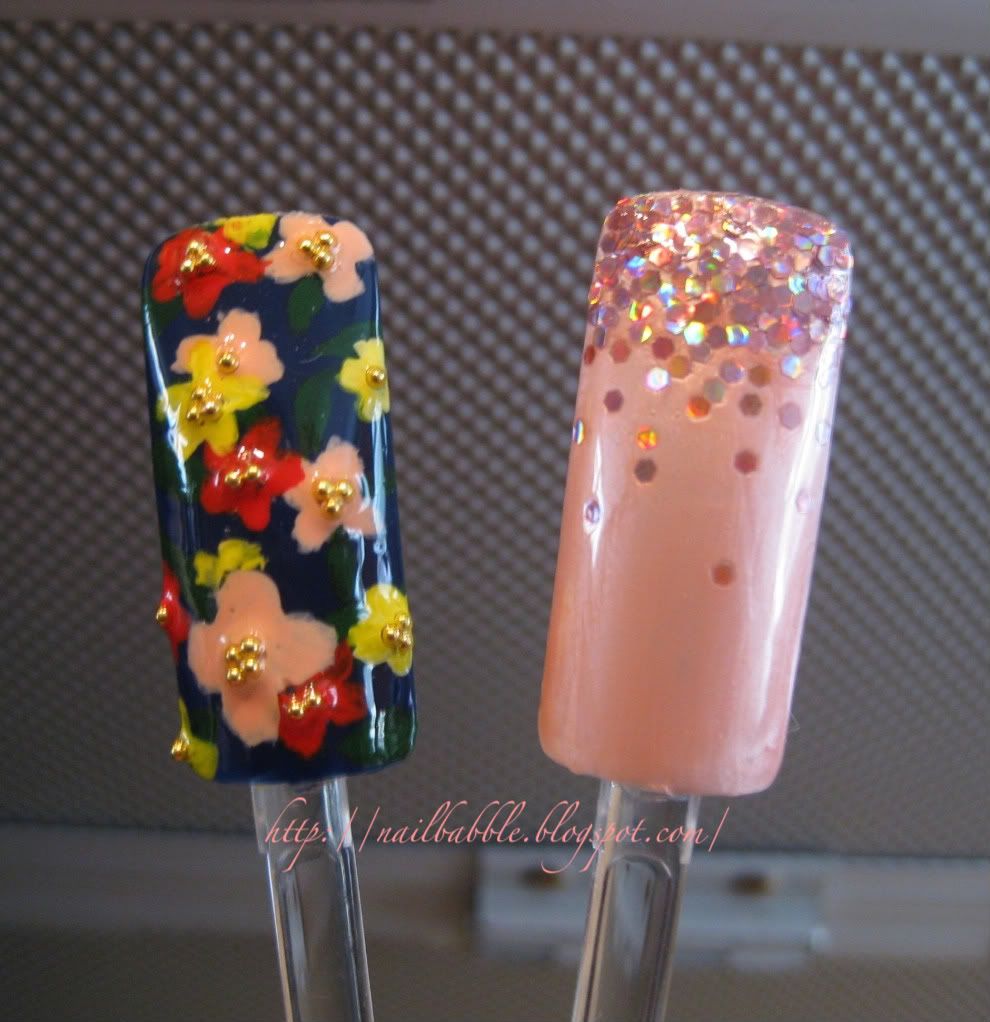
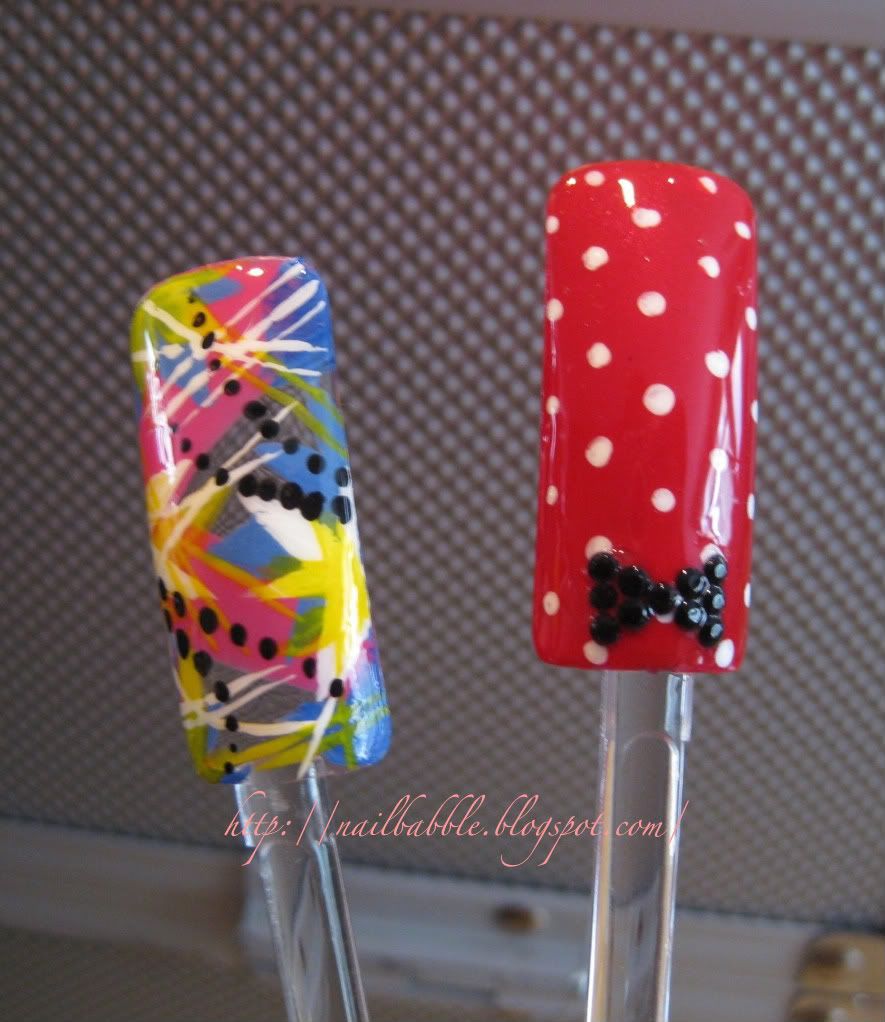
Here's a close up of the nail art that I have so far:

The one on the left I used a couple swipes of dark polish and then just used acrylic paint to create the flowers. Set the rhinestones using a sticky top coat and then sealed it with the same top coat. For the one on the right I just used these large glitter chucks I bought and used the same sticky top coat on the bottom 1/4 of the nail and then dunked it in the glitter. Then I used an orange wood stick to ensure that they were all flat, dipped the orange wood stick in more top coat and individually placed a few pieces to give it that "fade" and then a thick layer of top coat so that you can't feel the glitter pieces, it's just smooth.
 For the one on the left, I used a hot pink polish and made a couple of random swipes on the nail, then I used acrylic paint and a small paintbrush to create some flowers and then used a stripen brush to make some random lines. Then I took a marbelizer/dotting tool to make black dots in a row (actually, I hate looking at this pic cuz it's all blown up and it was my first time using this dotting tool and the line doesn't curve properly. Arg.) The one on the right was very simple, white dots made with a dotting tool and then just placed the rhinestones on top of a dollop of sticky top coat and then sealed it with the same top coat.
Now the thing is finding the time to make the rest of the colour pops! Haha, I'll get there eventually.
A little news on me, I was lucky enough to get an interview to a nail salon that I really wanted to apply to when I was done school. Turns out they're looking for someone part time at the moment and I jumped at the chance. It is literally the only place I wanted to apply to in my area. It's clean, classy and beautifully decorated. I had the interview this morning and I thought it went well from my perspective so keep your fingers crossed for me. It's been a long time since I've had a steady job (since I was pregnant the first time, like 6 years ago!) but I'm ready to get out there and prove to myself that I can do this. Yes I think you guys just walked in on me giving myself a pep talk. *awkward*
Anyway, I hope to be around more now that I have my computer. I'm hoping to be able to tote it around and maybe get in a few posts before my class on Mondays. I have to leave my house at 2pm before traffic hits but my class starts at 6pm, so I ususally have a good 3 hours to kill, which is better than sitting in traffic for 2 hours. Yikes. Anywho, hope you guys are doing well and I'll talk to you soon!


No comment for "EDITED: My nails #10: nail art designs on colour pops"
Post a Comment